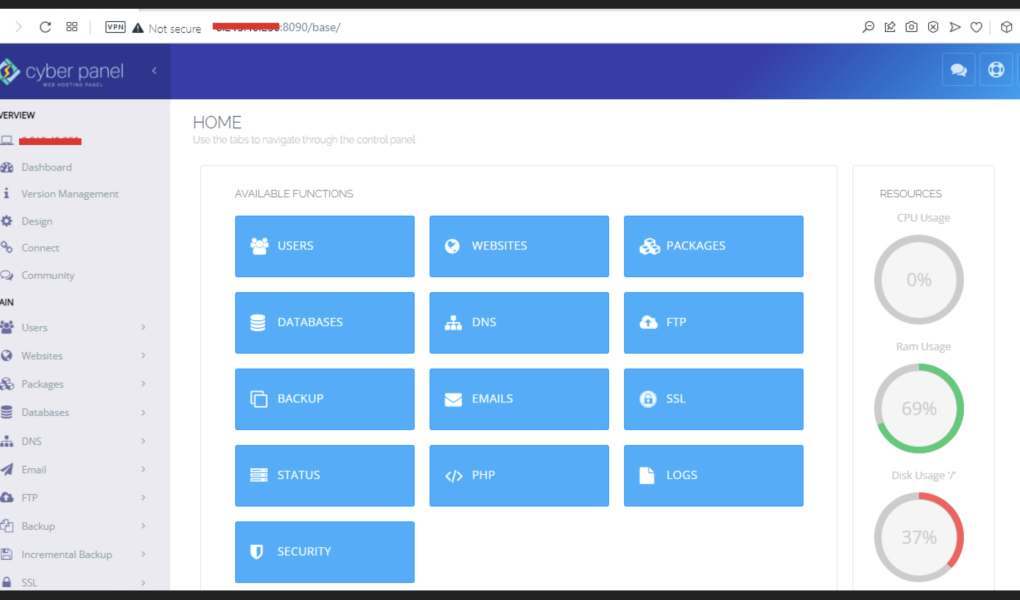
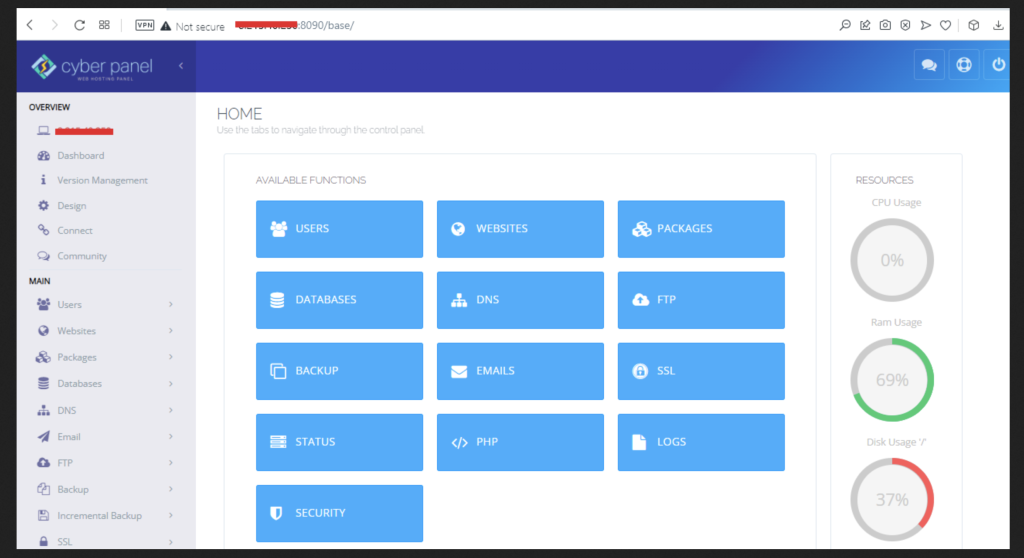
Berikut cara install CyberPanel di Ubuntu (disarankan Ubuntu 22.04 fresh install). CyberPanel menggunakan OpenLiteSpeed sebagai web server bawaan.
Minimum Requirement
- Ubuntu 20.04 / 22.04 fresh install
- RAM minimal 1 GB (disarankan 2 GB)
- Disk minimal 10 GB
- Akses root SSH
1. Login ke VPS via SSH
ssh root@IP_SERVERContoh:
ssh [email protected]2. Update Ubuntu
apt update && apt upgrade -y3. Jalankan Installer CyberPanel
Gunakan installer resmi:
sh <(curl https://cyberpanel.net/install || wget -O - https://cyberpanel.net/install)4. Pilih Jenis Installasi
Nanti muncul menu seperti ini:
1. Install CyberPanel with OpenLiteSpeed
2. Install CyberPanel with LiteSpeed Enterprise
3. Exit
Pilih:
1Karena OpenLiteSpeed gratis.
5. Ikuti Wizard Install
Biasanya pilih default saja:
Full service
Full service? [Y/n]Pilih:
YRemote MySQL
Remote MySQL? [y/N]Pilih:
NPassword Admin
Saat diminta password:
Choose [d]fault, [r]andom or [s]et password:Pilih:
sLalu masukkan password admin CyberPanel.
Redis & Memcached
Pilih:
Y6. Tunggu Proses Install
Biasanya 5–15 menit tergantung VPS.
Kalau selesai akan muncul:
CyberPanel Successfully InstalledDan info login:
https://IP_SERVER:8090
Username: admin
Password: password_yang_kamu_buat
7. Reboot Server
reboot8. Akses CyberPanel
Buka browser:
https://IP_SERVER:8090Contoh:
https://103.xxx.xxx.xxx:8090Login:
- Username:
admin - Password: password tadi
Port yang Harus Dibuka
Kalau pakai firewall/cloud provider, buka port:
| Port | Fungsi |
|---|---|
| 8090 | CyberPanel |
| 80 | HTTP |
| 443 | HTTPS |
| 21 | FTP |
| 25/587/465 | |
| 53 | DNS |
Install Dengan Domain + HTTPS
Misal nanti ingin:
panel.domain.comBisa pakai:
- Cloudflare Tunnel
- Nginx Reverse Proxy
- DNS A Record langsung ke VPS
Karena sebelumnya kamu juga pakai Cloudflare Tunnel untuk n8n, CyberPanel juga bisa dibuat tanpa IP public menggunakan metode yang sama.
Cek Status CyberPanel
Kalau panel tidak bisa dibuka:
systemctl status lscpdRestart:
systemctl restart lscpdBerikut cara setup CyberPanel Official Website menggunakan domain + SSL HTTPS di Ubuntu.
Topologi
Misal:
- VPS IP:
1.2.3.4 - Domain:
example.com - Panel:
panel.example.com
Hasil akhirnya:
https://panel.example.com1. Install CyberPanel
Install dulu CyberPanel seperti sebelumnya.
Setelah selesai:
https://IP_SERVER:8090Contoh:
https://1.2.3.4:80902. Buat DNS Domain
Masuk ke:
- Cloudflare
atau provider DNS lain.
Tambah A Record:
| Type | Name | Content |
|---|---|---|
| A | panel | IP_VPS |
Contoh:
panel.example.com -> 1.2.3.43. Tunggu DNS Propagasi
Cek:
ping panel.example.comHarus mengarah ke IP VPS.
4. Buka Port Firewall
Ubuntu UFW:
ufw allow 8090/tcp
ufw allow 80/tcp
ufw allow 443/tcp
ufw reload
Kalau pakai cloud firewall:
- AWS Security Group
- Contabo Firewall
- Vultr Firewall
Pastikan port:
- 80
- 443
- 8090
terbuka.
5. Install SSL LetsEncrypt
Login ke CyberPanel:
https://IP_SERVER:8090Lalu:
Menu:
SSL -> Manage SSLIsi:
- Domain:
panel.example.com
Klik:
Issue SSLCyberPanel akan otomatis request SSL dari:
Let’s Encrypt
6. Enable SSL untuk Panel
Masuk SSH VPS:
Edit config:
nano /usr/local/lscp/conf/httpd_config.confCari:
listener Default{Pastikan:
secure                  1
keyFile                 /etc/letsencrypt/live/panel.example.com/privkey.pem
certFile                /etc/letsencrypt/live/panel.example.com/fullchain.pem
7. Restart CyberPanel
systemctl restart lscpd8. Akses Domain HTTPS
Sekarang buka:
https://panel.example.com:8090atau jika reverse proxy:
https://panel.example.comOptional: Hilangkan Port 8090
Agar panel bisa dibuka tanpa:
:8090Gunakan:
- Cloudflare Tunnel Docs
- Reverse Proxy Nginx
- Reverse Proxy OpenLiteSpeed
Contoh Reverse Proxy Nginx
Install Nginx:
apt install nginx -yConfig:
nano /etc/nginx/sites-available/cyberpanelIsi:
server {
    listen 80;
    server_name panel.example.com;

    location / {
        proxy_pass https://127.0.0.1:8090;
        proxy_ssl_verify off;

        proxy_set_header Host $host;
        proxy_set_header X-Forwarded-For $proxy_add_x_forwarded_for;
    }
}
Enable:
ln -s /etc/nginx/sites-available/cyberpanel /etc/nginx/sites-enabled/Test:
nginx -tRestart:
systemctl restart nginxInstall SSL:
apt install certbot python3-certbot-nginx -yRequest SSL:
certbot --nginx -d panel.example.comJika Pakai Cloudflare Proxy
Kalau DNS Cloudflare proxied (orange cloud):
- SSL Mode:
Full (Strict)Menu:
SSL/TLS -> OverviewCek Status SSL
openssl s_client -connect panel.example.com:443Troubleshooting
SSL gagal issue
Biasanya karena:
- Port 80 tertutup
- DNS belum propagasi
- Domain salah
- Cloudflare Flexible SSL
CyberPanel tidak bisa dibuka
Restart:
systemctl restart lscpdCek:
systemctl status lscpdRekomendasi Security
Setelah install:
- Ganti password admin
- Disable root login SSH
- Install fail2ban
- Aktifkan firewall
- Gunakan SSH key
- Update Ubuntu rutin
Kalau mau, saya juga bisa bantu:
- CyberPanel + Cloudflare Tunnel tanpa IP public
- install WordPress auto SSL
- setup mail server CyberPanel
- install Docker di CyberPanel
- setup reverse proxy multiple domain
- hardening CyberPanel production server
- backup otomatis ke Google Drive/S3
Berikut cara install dan setup CyberPanel Official Website menggunakan Cloudflare Tunnel tanpa IP public.
Metode ini cocok kalau:
- VPS di rumah / kantor
- CGNAT
- Tidak punya public IP
- Mau akses panel HTTPS tanpa buka port router
Arsitektur
Internet
   ↓
Cloudflare
   ↓
Cloudflare Tunnel
   ↓
Ubuntu Server
   ↓
CyberPanel :8090
1. Install CyberPanel
Install CyberPanel dulu di Ubuntu.
Akses lokal:
https://IP_SERVER:8090Contoh:
https://192.168.1.10:80902. Tambahkan Domain ke Cloudflare
Masukkan domain ke:
Cloudflare Dashboard
Pastikan nameserver domain sudah mengarah ke Cloudflare.
3. Install cloudflared
SSH ke server Ubuntu.
Tambah repo:
curl -fsSL https://pkg.cloudflare.com/cloudflare-main.gpg | sudo gpg --dearmor -o /usr/share/keyrings/cloudflare-main.gpgecho "deb [signed-by=/usr/share/keyrings/cloudflare-main.gpg] https://pkg.cloudflare.com/cloudflared jammy main" | sudo tee /etc/apt/sources.list.d/cloudflared.listInstall:
apt update
apt install cloudflared -y
4. Login Cloudflare Tunnel
cloudflared tunnel loginNanti muncul URL login browser.
Pilih domain Cloudflare kamu.
5. Buat Tunnel
cloudflared tunnel create cyberpanelContoh output:
Tunnel credentials written to:
/root/.cloudflared/xxxxx.json
6. Buat DNS Tunnel
Misal domain:
panel.example.comJalankan:
cloudflared tunnel route dns cyberpanel panel.example.com7. Buat Config Tunnel
nano /root/.cloudflared/config.ymlIsi:
tunnel: TUNNEL_ID
credentials-file: /root/.cloudflared/TUNNEL_ID.json

ingress:
  - hostname: panel.example.com
    service: https://localhost:8090
    originRequest:
      noTLSVerify: true

  - service: http_status:404
Ganti:
TUNNEL_IDdengan ID tunnel kamu.
8. Jalankan Tunnel
Test dulu:
cloudflared tunnel run cyberpanelKalau sukses:
Connected to Cloudflare9. Jadikan Service Otomatis
cloudflared service installEnable:
systemctl enable cloudflaredStart:
systemctl start cloudflaredCek:
systemctl status cloudflared10. Akses CyberPanel
Sekarang buka:
https://panel.example.comTanpa:
:8090Dan otomatis HTTPS SSL dari:
Cloudflare
OPTIONAL — Lockdown Security
Karena memakai tunnel:
- Tidak perlu buka port 80/443 ke internet
- Tidak perlu NAT router
- Bisa close semua inbound firewall
UFW:
ufw deny 80
ufw deny 443
ufw deny 8090
Karena Cloudflare Tunnel menggunakan outbound connection.
OPTIONAL — Zero Trust Login
Bisa tambah authentication:
- Google Login
- GitHub Login
- OTP Email
Menu:
Cloudflare Zero TrustLalu:
Access -> ApplicationsJadi sebelum login CyberPanel harus login Cloudflare dulu.
Troubleshooting
Tunnel offline
Cek:
systemctl status cloudflaredLogs:
journalctl -u cloudflared -fBad Gateway
Biasanya karena:
- CyberPanel mati
- Salah localhost port
- HTTPS/HTTP mismatch
Test:
curl -k https://localhost:8090SSL Error
Pastikan DNS:
Proxied (orange cloud)di Cloudflare.
Rekomendasi Production
Untuk production:
- Ubuntu 22.04
- Minimal RAM 2 GB
- Enable Cloudflare Access
- Disable root SSH
- SSH key only
- Install fail2ban
- Backup otomatis