
“Create an Internal Load Balancer”
Pengantar
Google Cloud menawarkan Load Balancing Internal untuk lalu lintas berbasis TCP/UDP Anda. Load Balancing Internal memungkinkan Anda untuk menjalankan dan menskalakan layanan Anda di belakang alamat IP penyeimbangan beban pribadi yang hanya dapat diakses oleh mesin virtual internal Anda.
Praktikum
Task 1. Configure HTTP and health check firewall rules
Explore the my-internal-app network
- In the Console, navigate to Navigation menu > VPC network > VPC networks.
- Scroll down and notice the my-internal-app network with its subnets: subnet-a and subnet-b
Create the HTTP firewall rule
- Still in VPC network, in the left pane click Firewall.
- Notice the app-allow-icmp and app-allow-ssh-rdp firewall rules.
- These firewall rules have been created for you.
- Click Create Firewall Rule.
- Set the following values, leave all other values at their defaults:
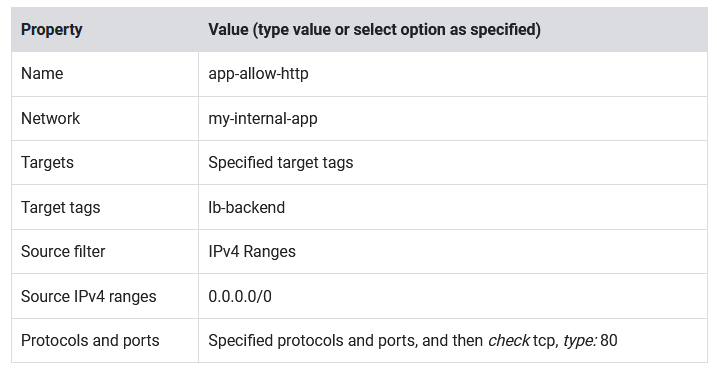
- Click Create.
Create the health check firewall rules
- Still in the Firewall rules page, click Create Firewall Rule.
- Set the following values, leave all other values at their defaults:
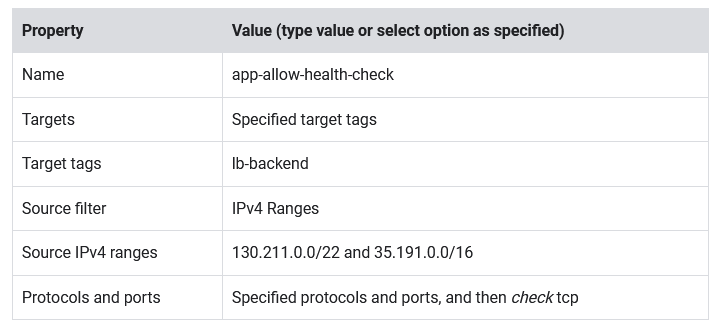
- Click Create.
Task 2. Configure instance templates and create instance groups
Configure the instance templates
- In the Console, navigate to Navigation menu > Compute Engine > Instance templates.
- Click Create instance template.
- For Name, type instance-template-1.
- For Series, select N1.
- Click Advanced options.
- Click Networking.
- For Network tags, specify lb-backend.
- For Network interfaces, click the dropdown icon to edit.
- Set the following values, leave all other values at their defaults:
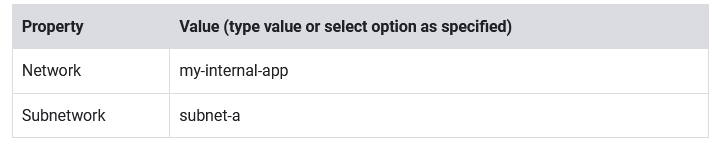
- Click Done.
- Click Management.
- Under Metadata, click Add item and specify the following:

- Click Create.
- Wait for the instance template to be created.
Configure the next instance template
- Still in Instance templates, check the box next to instance-template-1, then click Copy. You will see the instance is named instance-template-2.
- Click Advanced options.
- Click the Networking tab.
- For Network interfaces, click the dropdown icon to edit.
- Select subnet-b as the Subnetwork.
- Click Done and then click Create.
Create the managed instance groups
- Still in Compute Engine, in the left pane click Instance groups, and then click Create Instance group.
- Set the following values, leave all other values at their defaults:
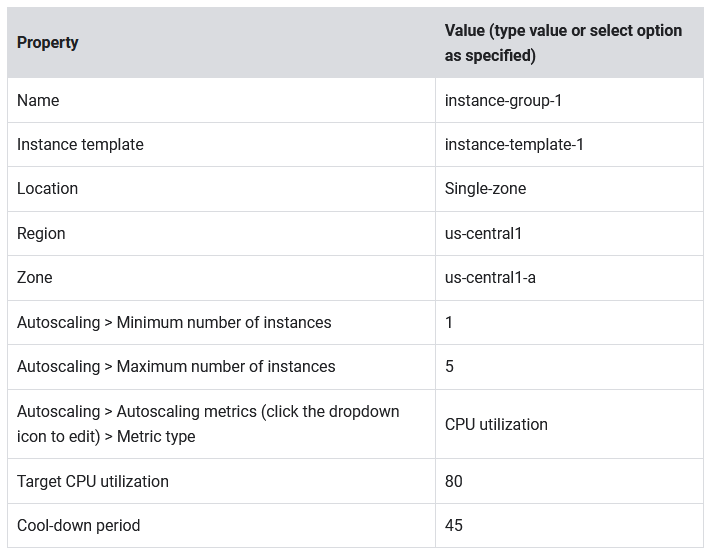
- Click Create.
- Repeat the same procedure for instance-group-2 in us-central1-b:
- Click Create Instance group.
- Set the following values, leave all other values at their defaults:
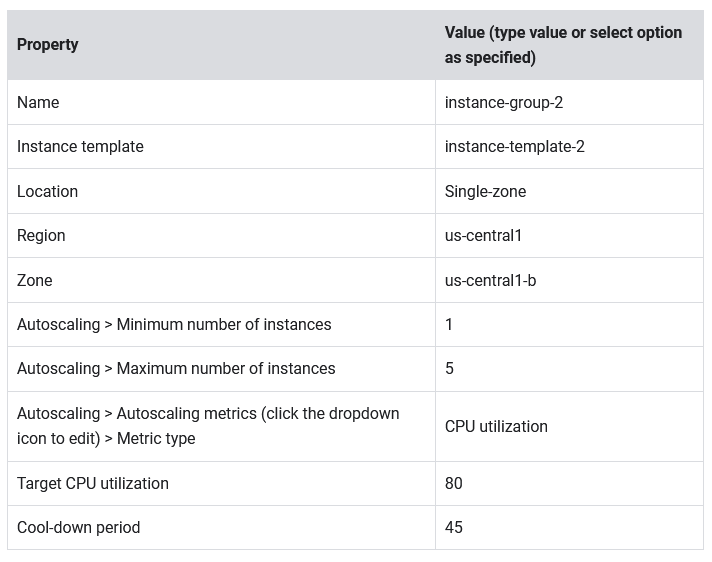
- Click Create.
Verify the backends
Verify that VM instances are being created in both subnets and create a utility VM to access the backends’ HTTP sites.
- Still in Compute Engine, click VM instances.
- Notice two instances that start with
instance-group-1andinstance-group-2. - These instances are in separate zones and their internal IP addresses are part of the subnet-a and subnet-b CIDR blocks.
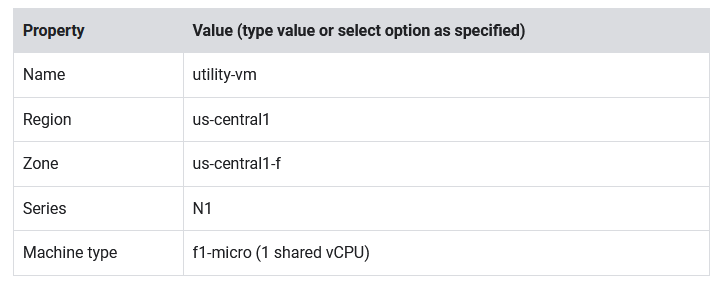
- Click Create instance.
- Set the following values, leave all other values at their defaults:
- Click Advanced options.
- Click Networking.
- For Network interfaces, click the dropdown icon to edit.
- Set the following values, leave all other values at their defaults:
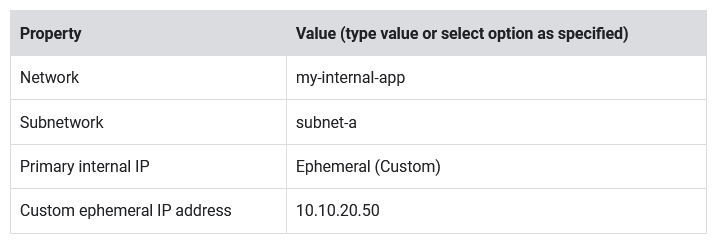
- Click Done and then click Create.
- Note that the internal IP addresses for the backends are
10.10.20.2and10.10.30.2 - For utility-vm, click SSH to launch a terminal and connect.
- To verify the welcome page for
instance-group-1-xxxx, run the following command:
curl 10.10.20.2- To verify the welcome page for
instance-group-2-xxxx, run the following command:
curl 10.10.30.2Task 3. Configure the Internal Load Balancer
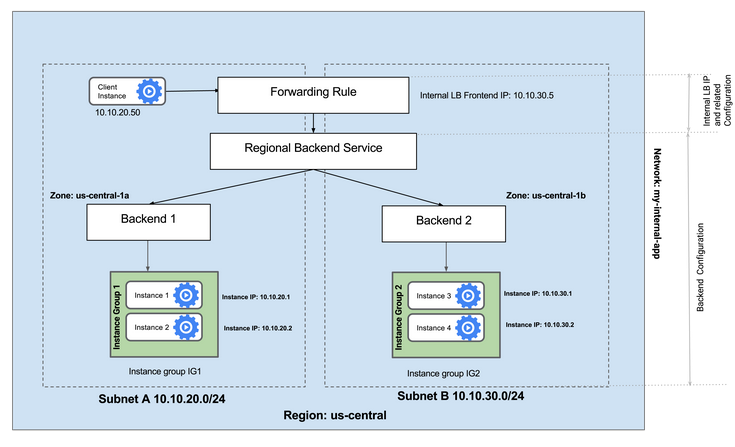
Configure the Internal Load Balancer to balance traffic between the two backends (instance-group-1 in us-central1-a and instance-group-2 in us-central1-b), as illustrated in this diagram:

Start the configuration
- In the Cloud Console, navigate to Navigation menu > Network Services > Load balancing, and then click Create load balancer.
- Under TCP Load Balancing, click on Start configuration.
- For Internet facing or internal only, select Only between my VMs.
- Click Continue.
- For Name, type
my-ilb. - For Region, select us-central1.
- For Network, select my-internal-app.
Configure the regional backend service
- Click on Backend configuration.
- Set the following values, leave all other values at their defaults:

- Click Add backend.
- For Instance group, select instance-group-2 (us-central1-b).
- For Health Check, select Create a health check.
- Set the following values, leave all other values at their defaults:
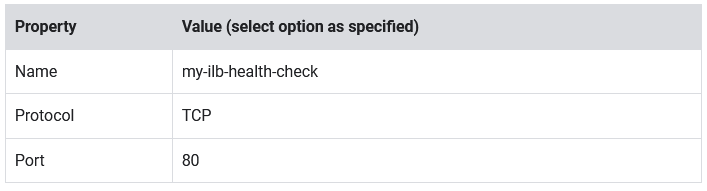
- Click Save.
- Click Done.
- Verify that there is a blue check mark next to Backend configuration in the Cloud Console. If not, double-check that you have completed all the steps above.
Configure the frontend
- Click on Frontend configuration.
- Specify the following, leaving all other values with their defaults:
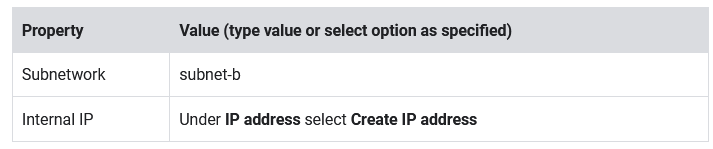
- Specify the following, leaving all other values with their defaults:
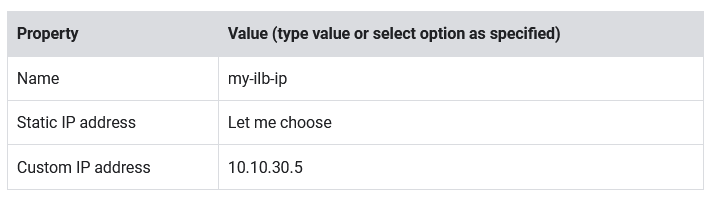
- Click Reserve.
- In Port number, type
80. - Click Done .
Review and create the Internal Load Balancer
- Click on Review and finalize.
- Review the Backend and Frontend.
- Click on Create. Wait for the Load Balancer to be created, before moving to the next task.
Task 4. Test the Internal Load Balancer
Verify that the my-ilb IP address forwards traffic to instance-group-1 in us-central1-a and instance-group-2 in us-central1-b.
Access the Internal Load Balancer
- In the Cloud Console, navigate to Navigation menu > Compute Engine > VM instances.
- For utility-vm, click SSH to launch a terminal and connect.
- To verify that the Internal Load Balancer forwards traffic, run the following command:
curl 10.10.30.5Penutup
Sahabat Blog Learning & Doing demikianlah penjelasan mengenai Create an Internal Load Balancer. Semoga Bermanfaat . Sampai ketemu lagi di postingan berikut nya.